Controlarea unui LED RGB cu Arduino Uno
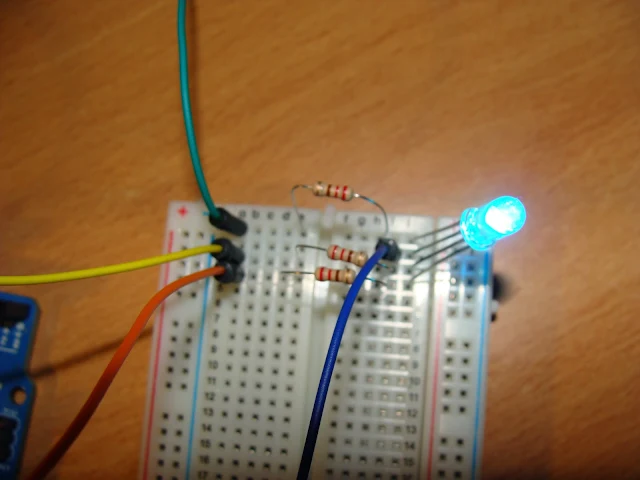
Am fost foarte curios cum aș putea să controlez un LED RGB folosind Arduino Uno și am purces la treabă. Mi-am cumpărat un LED RGB , 3 rezistente de 220 ohmi și 4 fire , iar apoi le-am conectat ca în imaginile de mai jos.
Schema electronică
Arată cam așa :
Montajul electronic
Conexiunea tuturor firelor cu placa Arduino:
Conexiunea la pinii LED RGB:
Conexiunea la pinii Arduino:
Placa DIY bazata pe Arduino:
Progrămelul de control :
This file contains bidirectional Unicode text that may be interpreted or compiled differently than what appears below. To review, open the file in an editor that reveals hidden Unicode characters.
Learn more about bidirectional Unicode characters
/* | |
Florin Simedru | |
Complete project details at https://automatic-house.blogspot.com | |
Permission is hereby granted, free of charge, to any person obtaining a copy | |
of this software and associated documentation files. | |
The above copyright notice and this permission notice shall be included in all | |
copies or substantial portions of the Software. | |
*/ | |
int redPin = 11; | |
int greenPin = 10; | |
int bluePin = 9; | |
//uncomment this line if using a Common Anode LED | |
//#define COMMON_ANODE | |
void setup() | |
{ | |
pinMode(redPin, OUTPUT); | |
pinMode(greenPin, OUTPUT); | |
pinMode(bluePin, OUTPUT); | |
} | |
void loop() | |
{ | |
setColor(255, 0, 0); // red | |
delay(1000); | |
setColor(0, 255, 0); // green | |
delay(1000); | |
setColor(0, 0, 255); // blue | |
delay(1000); | |
setColor(255, 255, 0); // yellow | |
delay(1000); | |
setColor(80, 0, 80); // purple | |
delay(1000); | |
setColor(0, 255, 255); // aqua | |
delay(1000); | |
} | |
void setColor(int red, int green, int blue) | |
{ | |
#ifdef COMMON_ANODE | |
red = 255 - red; | |
green = 255 - green; | |
blue = 255 - blue; | |
#endif | |
analogWrite(redPin, red); | |
analogWrite(greenPin, green); | |
analogWrite(bluePin, blue); | |
} |
Tutorial inspirat de pe learn.adafruit.com.
Week-end plăcut tuturor!